High-Wire Act: Giving a Period Picture Rail the Second Life It Deserves

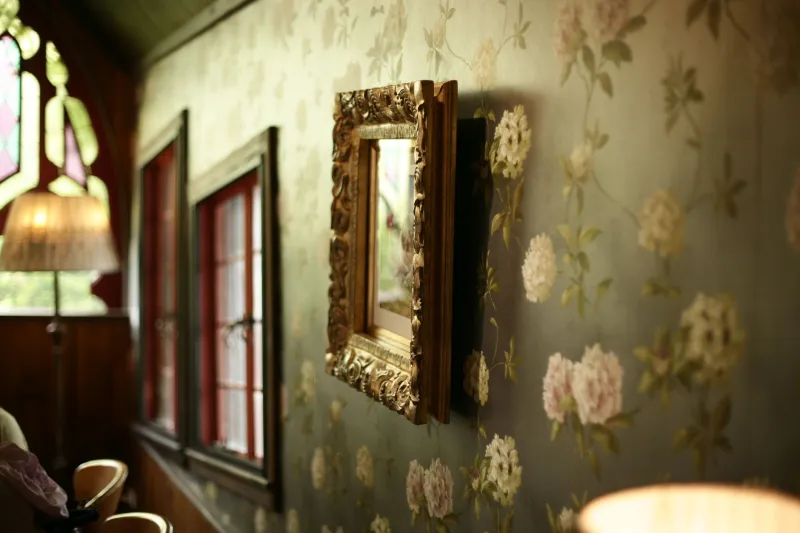
Photo: Michael Garlick , CC BY-SA 2.0, via Wikimedia Commons
Look up in any Victorian or Edwardian room and you will usually find a slim moulding running around the walls about 30cm below the ceiling. Most people assume it is ornamental. It is not. The picture rail was invented to solve a practical problem, and in a house full of old plaster it solves exactly the same problem today.
Why the rail was there in the first place
Interior walls in period homes were finished in lime plaster on timber laths, and lime plaster is wonderful, breathable stuff that does not enjoy having holes punched into it. Hanging a heavy gilt frame from a nail meant either finding a joist by luck or watching a fist-sized lump of plaster drop onto the carpet.
So builders ran a timber rail around the room at picture-hanging height — usually level with the top of the window, somewhere between 2.1m and 2.4m from the floor — fixed back to the structure of the wall. You hooked a brass picture hook over the moulding, dropped a cord, and the weight went into the building rather than the plaster. Fast, reversible, and entirely without filler.
A rail protects more than your walls
Once you have hung art from hooks and cord, nothing about your wall treatment is permanent. No nail holes to fill, no touch-up painting, no arguments with a wall that has been repainted eleven times. You can move a picture in four minutes on a Sunday afternoon, and the wall behind it is untouched.
There is a decorative argument too. A run of pictures hung below the rail, rather than up to the ceiling, makes a high-ceilinged room feel grounded at the bottom and generously tall at the top. It is the arrangement period rooms were designed around, and it is why a bare wall above a picture rail often looks slightly naked even when the walls below are full.
Check your rail before you load it
Not every rail is still doing its job. A century of decorating, and a few enthusiastic previous owners, means some are barely attached. Before you hang anything, push firmly upwards on the moulding in a couple of spots. If it moves, or if it is only held by filler, get a joiner to re-fix it into the wall behind.
Treat it as a hanging system, not a load-bearing beam. Plates, small framed prints and modest mirrors are all fine. A 12kg gilt mirror over a fireplace is not — that is a job for a proper wall fixing into masonry or a stud. And resist hanging anything directly above the rail; the whole point is that the weight pulls down and slightly in towards the wall.
Hooks, cord and the small parts that matter
Brass picture hooks with the little backward lip are what the rail was designed for: the lip sits over the moulding and stops the hook tipping forward. You can buy them in most good ironmongers for a couple of pounds each and they will outlast you.
For cord, go for a proper braided hanging cord or waxed linen rather than fishing line. Attach it to two D-rings on the back of the frame with split rings, so the cord forms an upside-down V with an angle of roughly 60 degrees at the top — not a wide, flat triangle. Two attachment points spread the load and stop the frame drifting out of level, which is the single most common reason a hung picture ends up crooked by week three.
And no nails into the plaster. That is the one rule.
Heights that look deliberate
The convention in period rooms was to centre pictures at around 1450–1520mm from the floor, which is roughly eye level for a standing adult, and to sit the bottom edge 150–250mm above any furniture below. Keep the centre line consistent across a run of frames on the same wall and the arrangement immediately looks as though someone thought about it.
Cord lengths will vary with frame size, which is fine — the top-line of the cords meeting the rail is what should feel regular, not the top of each frame.
A calm mix, not a crowded gallery
Three to five pieces on a chimney breast or along one wall is generous. Eight is a collection. Fifteen is a jumble sale with better lighting.
Mix sizes, but hold something constant — a frame finish, a subject, a palette, or simply black and white. Space frames 50–80mm apart so each one breathes, and leave at least a hand's width at each end of the run so the group does not butt uncomfortably into a corner or a doorway. Asymmetric arrangements look more natural than symmetrical ones in old rooms, because nothing else in the room is symmetrical either.
If your frame collection outstrips the rail, do not stack a second row above — that is precisely the look the rail was there to avoid. Rotate a few pieces into another room or into storage. It is a nicer trick than it sounds: the walls change with the seasons and nothing needs re-plastering.
If your rail is gone
Plenty of homes lost theirs to a 1970s flat-ceiling and a tub of filler. Reinstate a matching profile — most timber merchants will run a length to a sample, and a joiner can fix it back into the wall properly — and the room will suddenly regain a top and a bottom. Where the budget or the wall will not allow it, a shallow picture ledge does a similar job and gives you somewhere to lean the smaller frames.
It is one of the least glamorous bits of moulding in the house, and one of the most quietly useful. Give it a clean, check its fixings, and let it do what it was built for.